Showing posts with label DIY. Show all posts

Thursday, June 18, 2015

A Room for Little Sister

I'm resurrecting this blog to share some room transformations in our new house (well almost a year broken in now!).

My favorite room in our home is my latest project: a nursery for our soon to be arriving little miss.  We had this spare bedroom painted before we were even pregnant, and I chose a deep teal as I was really crushing on the teal/coral color combination at the time.  Thank goodness for a little girl filling the room, otherwise I would have had to be a bit more creative making the space suitable for a little man (for those that have a little man, red would be a great accent color!).

Because the color on the walls is so rich, I went with a softer pallet of white, coral and gold for everything else.  We decided on buying a new dresser and convertible crib instead of using Sienna's furniture and chose the Child Craft Soho collection in white; which is a sleek, modern design with honey colored legs.

I was inspired by the elegance of gold used in some Hobby Lobby prints I picked up so chose this as an accent color for frames and other details throughout the room.   One of the first things I changed when we got our furniture were the pull handles on the dresser.  I took all the chrome handles off and spray painted gold.  Perfection!

Hobby Lobby prints

Updated to have gold pulls

I just recently picked up sewing, easing into the hobby my making cute cotton baby bibs.  From there, I became ambitious, choosing to not spend hundreds of dollars on some bedding I had my eye on in an Etsy shop, and instead choosing to tackle making it myself.  I had picked up a fabric intended for bibs, but quickly realized how much I loved it for the nursery.  I scoured online shops to find more and was able to order a few yards from a site called Quilt Sandwich Fabrics.


There are literally tutorials for EVERYTHING online these days.  My initial plan was to create a crib sheet and changing pad cover, but I decided on a changing pad cover, crib skirt and pillow cover instead.  I already had two great sheets which would mix well with this patterned fabric.

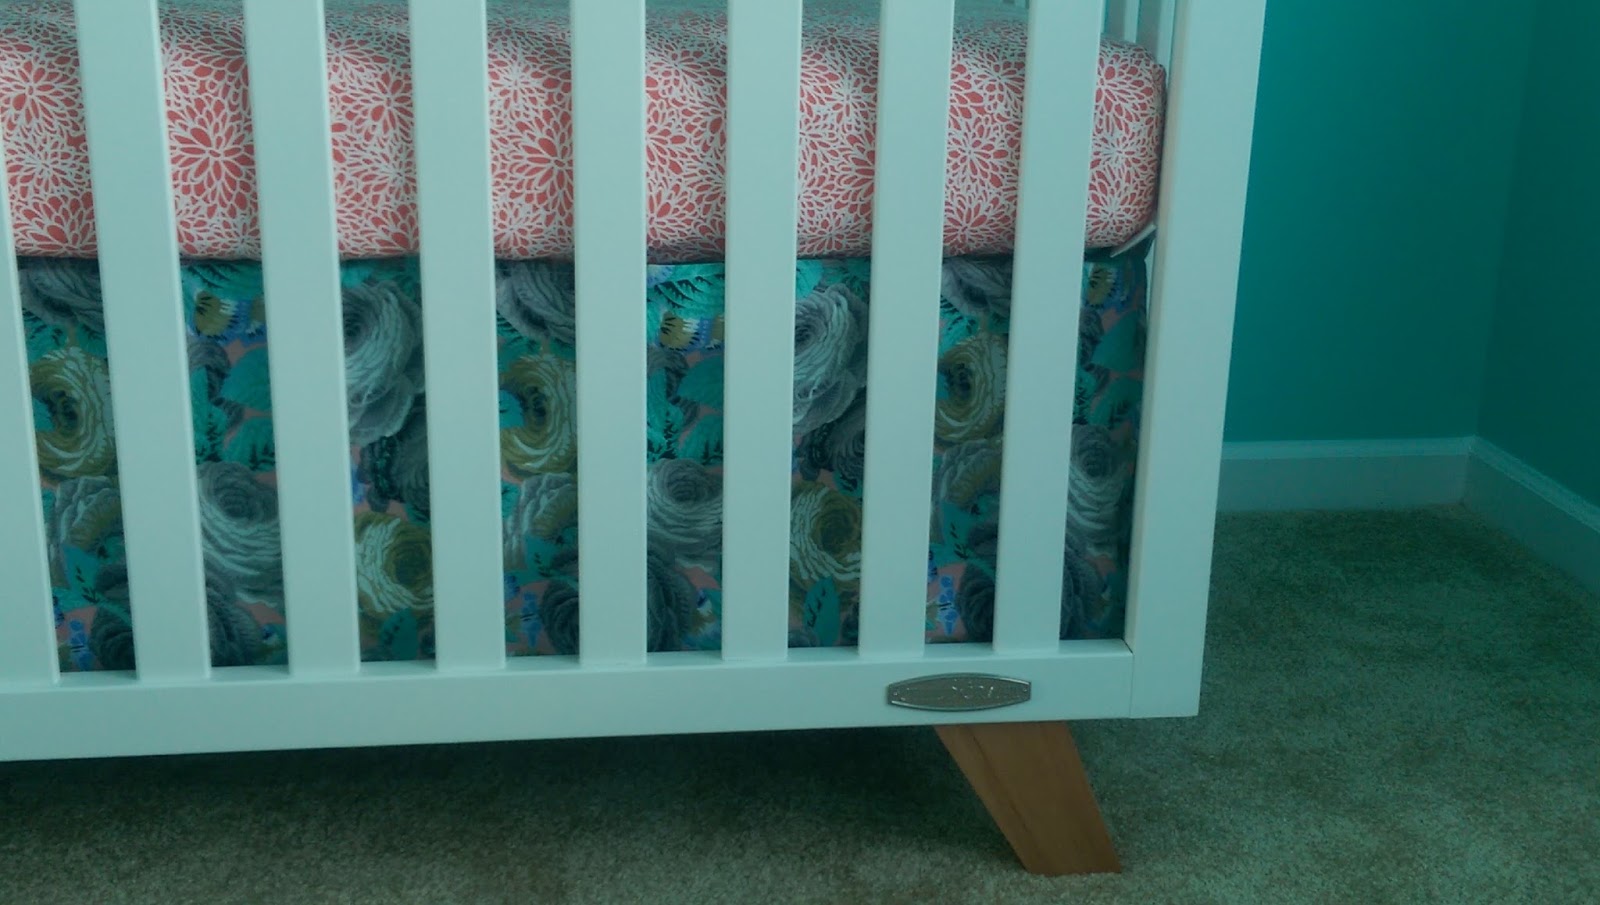
I found a genius crib skirt tutorial, which recommended making adjustable panels instead of a single size skirt that would bunch on the ground as we lowered the mattress height.  I didn't use a crib skirt for Sienna's crib and don't generally like the look of one, but with this crib, it felt necessary.  I hung each panel with safety pins on the wire mattress frame.
Too bare looking without a skirt!
Adjustable crib skirt
Changing pad and pillow covers
I hung my prints over the dresser with two cardboard cut outs painted coral, making a small gallery wall.

Hobby Lobby prints

If your a longtime reader, you may recall my Ikea meltdown when doing Sienna's room.  I had really wanted their spice racks to use as bookshelves, but they were out of them each trip up there.  This time around, we quickly snagged a couple spice racks for the new nursery.  I picked up a stain at Lowe's that matched the honey colored wooden legs in our furniture and stained the shelves.  We had an old mirror laying around that I spray painted gold as what little one doesn't love looking at her/his self!

Stained bookshelves

Lastly, we pulled our white slip-covered JennyLund chair (also part of that Ikea meltdown) into the room with a small gray foot ottoman we already had for a comfy sitting area.  I hung some paper lights down the wall which will act as a nice night light, and found a gold accent table at Hobby Lobby (I swear they have everything!).


The room is 95% done now, with a few small details to be added over the coming weeks.  We'll add baby girls initials over her crib and probably a few newborn prints on the wall above the chair.  We also currently have a sheer white curtain on the window, but will likely add a double rod with a heavier fabric to make the room darker.  I haven't settled on a fabric yet for this.

Here's how it all ties together!  We can't wait to welcome our newest little one into her cozy abode - any day/week now!


Sunday, March 9, 2014

Creating Simple Art

Artwork can make a room come together.  It can act as a focal point, or a subtle accent.

I seem to always struggle to find the right piece of art for a room.  So, many times, I tend to create it myself.  I'm not overly handy and I don't consider myself an artist, so I try to stick with abstract, fun pieces.

Here are some ways to create simple, fun pieces of art for your home.

1) Scrapbook paper!  I usually have a 12 x 12 book of scrapbook paper and some cheap Ikea frames on hand.  Using scrapbook paper is a cheap and easy way to bring some color into a room.  I especially love using scrapbook paper in a photo collage or gallery.  I try to mix these in with other prints and photos.  Here are some photos of how I used it on our laundry room makeover.  

Need: Scrapbook paper, frame, scissors


2)  Duct tape!  Recently, I was trying to find a fun way to bring color into Sienna's play room in a child friendly way.  Duct tape now comes in dozens of fun prints and colors and can be an easy way to cover a canvas.  I found a fun floral print that complimented the emerald green color of the room, so I tested it out.

Duct tape

I covered three canvas boards with the duct tape, including all sides.  I didn't match up the print since it would have been difficult to do so and I liked the abstract look - but you can do so if you'd like.

After covering the canvases, I decided to use some poster board to cut out silhouettes of animals.  I free hand drew each one and think they came out pretty decent!  To make the silhouettes look more polished, I added a few coats of white paint I had sitting around.

Fun animal silhouettes!

I then applied Modge Podge to the back of each silhouette and adhered them to their own duct taped covered canvas.  Once dry, I took the Modge Podge and applied another coat to the entire canvas.

Here's the finished product! (I know, a little uneven, but I've since fixed!)

Need:  Duct tape, poster board, scissors, Modge Podge, canvas, and paint (optional) 

Playroom artwork

3)  Canvas Photos!  I recently posted about our upstairs kids bathroom makeover and how I was hoping to add some kid friendly wall hangings to it.  I got rid of the "Le Bain" piece, and added some fun photos of Sienna in the bath.

I ordered the prints I wanted from mpix.com in a size the matched the canvases I picked up at Wal-Mart (11 x 14).  The quality from mpix is great and they shipped pretty fast.


I then used leftover stain from our bathroom makeover to cover the white canvases.  Paint would probably have dried faster, but I think using the same stain as the cabinets and mirror frame allowed the pieces to tie in nicely with the room.  I let the canvases dry for 24 hours before applying Modge Podge to the backs of my photos and adhering them.


Once dry, I coated the entire photo and canvas sides with a coat of Modge Podge.  I then took some sand paper and gently went over the edges of my photos.  This helped soften the edges and make the photo blend into the canvas.  I probably didn't need the coat of Modge Podge at that time - as it ended up peeling when I sanded the edges.  I pulled most of it off and applied another coat once my sanding was done.

I'm going to add an acrylic sealant since these are going to hang in the bathroom, but I still need to pick that up.  In the meantime, I hung them in the bathroom so I can appreciate my work! 

Need:  Photos, canvas, Modge Podge, paint/stain, sandpaper, acrylic sealant (optional)


There are endless ways to get creative with the art in your home.  Hopefully this post helped you come up with some ideas to bring color and personality into your home through art/pictures!